Process work on Tack Down Tuesday
Just did this sketch Monday morning...
Along with my viewfinder images...I'm inspired by the husband work with blacksmithing and the Gnarly stuff he's been making.
So I begin...Cutting my papers repetitively and placing them on this coat piece of plywood. On both sides of the art will be something different to kind of frame it out. Long strip of black on the right and cut up strips on the left.
Side view the the next paper that will be tacked down.
With the board here I let the paper hang over and then use the sanding block to sand off the extra.
Sealing everything down now is what I want to do before I bring in the acrylics and do the gestural marks.
Love these little sponge rollers... I get them at Home Depot. squirt out just enough to coat the sponge and roll it in good.
Get my Marking tool ready and some baby wipes or a damp cloth...with the back ground coated with the polymer it allow the slickness you need to do the gestural marks and if your marks don't work out then you can wipe off and start again..but you have to be quick about it. Let this dry....
Then I use the Fine Line Applicator that Jo Toye uses in her new book... kind of fun to use them... but with a textural surface that I have you get some broken lines...got to be ready for that. Let dry.
I decided to bring in some more acrylic paints before I continued to collage. The tool I'm using is from a Music box...it creates some cool fine lines too. I let this dry too. before I coat everything with polymer so it will tack down well later.
If you can set up a hair dryer that's great or buy yourself one of these little fan and prop it up and let fan away.....
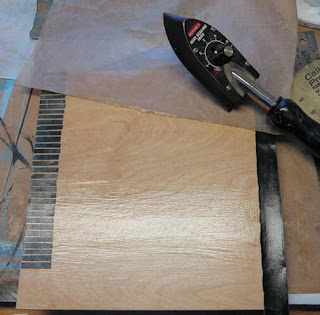
Added my two piece at the bottom...with the tack iron and fused it in to place.
A few more things when on then some splattering. If you want an area only to have splatter I use the deli sheets to block out an area or like this one tear a hole and splatter only in the hole.
Most Extensive
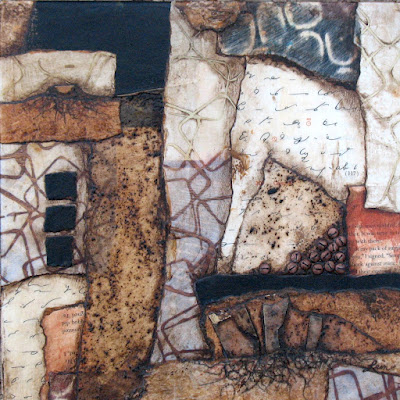
10 x 10 collage on plywood board.
Along with the students I expand and contract to each step I take when I put a piece of paper down or add more paint. I honestly like the magazine sketch from the sketchbook at the top of the blog post better then the darker colors in this piece. Some areas I'm really happy about others I'm not sure of. They say only show your best work...well somewhere along the process who can tell what is your best work...I have favorites and ones that I really am not willing to part with and others people really like and I'm not to keen on them...so I'm about showing them all and letting people see the process. I wanted to call this piece Expand then I looked up the definition and seen the words Most Extensive and thought it fitting.
$95.00 ready to hang on the wall






Thank you for sharing your work method. I am your biggest KVAL member fan. Your work is one of the first collages/collage methods I have truly enjoyed watching grow since your first visit to KVAL. Hope you can visit again.
ReplyDeleteHi Sherry that was some time ago...I think I forgot my paints and use my water soluble crayons for that workshop. Thanks for stopping by.
DeleteI really enjoy seeing your step-by-step process. It really gives me wonderful insight into what you're thinking and the various decisions that are made as you are working. Thanks for posting this!
ReplyDeleteYour welcome Jenny
DeleteYour welcome Jenny
Delete